This post may contain affiliate links, and I earn from qualifying purchases. Please read our privacy policy.
Red Velvet Cake Pops are a fun dessert to serve at a party. And since these are red velvet, Valentine’s Day and Christmas make sense!
There’s something fun about eating food on a stick. And when it’s really pretty, that’s even better. Cake pops are considered “fun food.” Kids always ask their parents to buy them a cake pop at Starbucks. But it’s super fun to make them homemade too. If you don’t wish to make “pops,” you can opt to make red velvet cake “balls” instead. We credit our friend Bakerella for inventing the cake pop and giving us the idea for making red velvet cake balls!
Ingredients needed:
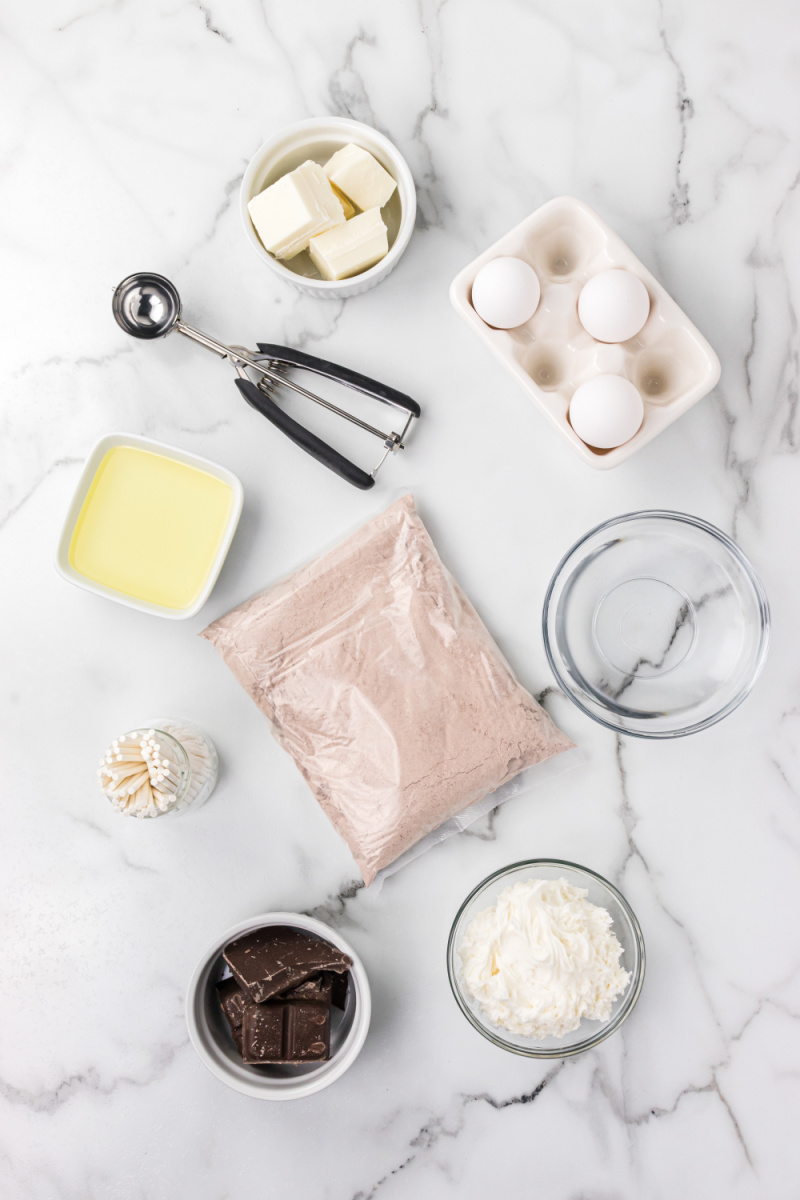
- box of red velvet cake mix
- can of cream cheese frosting
- chocolate bark or melting wafers
- cake pop sticks
- sprinkles
How to make Red Velvet Cake Pops:
The complete recipe with instructions is at the end of this post.
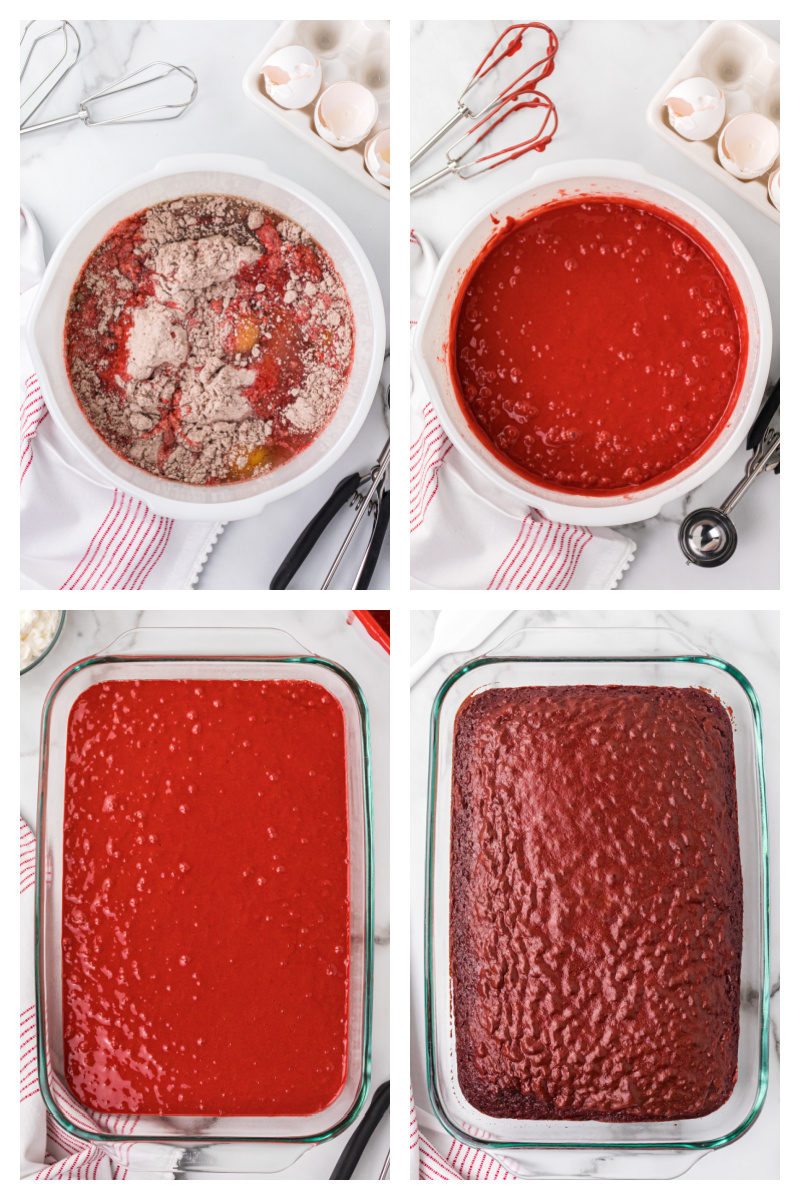
This recipe begins with a boxed cake mix. We’re using red velvet here, but of course you can use any flavor of cake mix that you’d like. Follow the directions on the box to make a 9×13-inch cake.
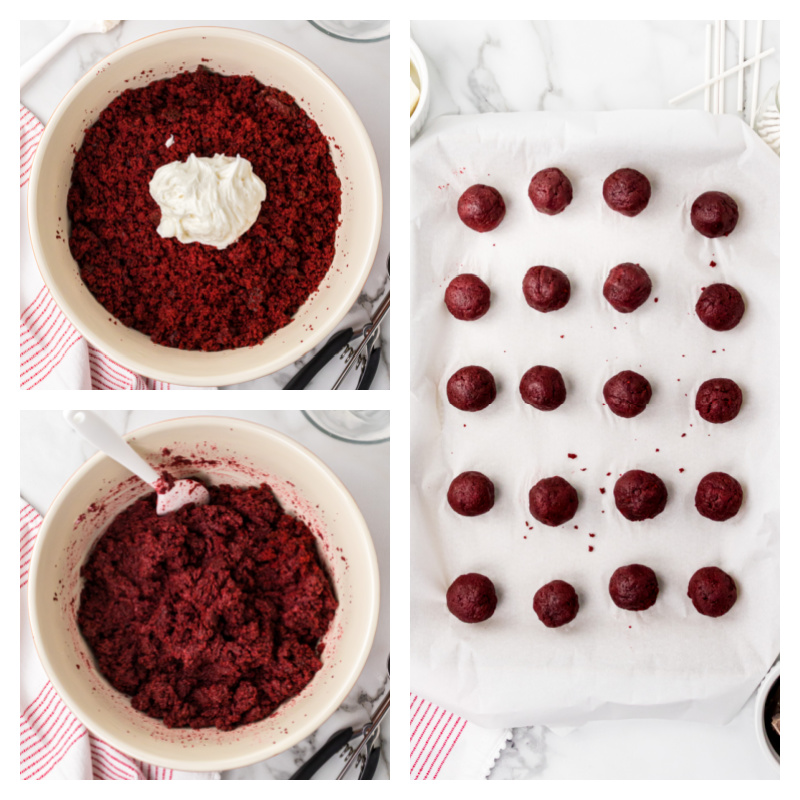
Now I know this seems crazy, but the next step is crumbling the entire cake into a bowl. Then you’re going to add 1/2 can of cream cheese frosting to the cake crumbs. Stir to combine. Add more frosting, if needed. You just want the cake crumbs to get to the consistency of being able to roll into a ball. Then roll the mixture into balls, and place them on a wax paper-lined baking sheet. Refrigerate until the cake balls are firm.

This is another one of those recipes that my son Brooks (RecipeBoy) made when he was younger (12 years old). I’ve kept a few of the photos from when he originally worked on this project!
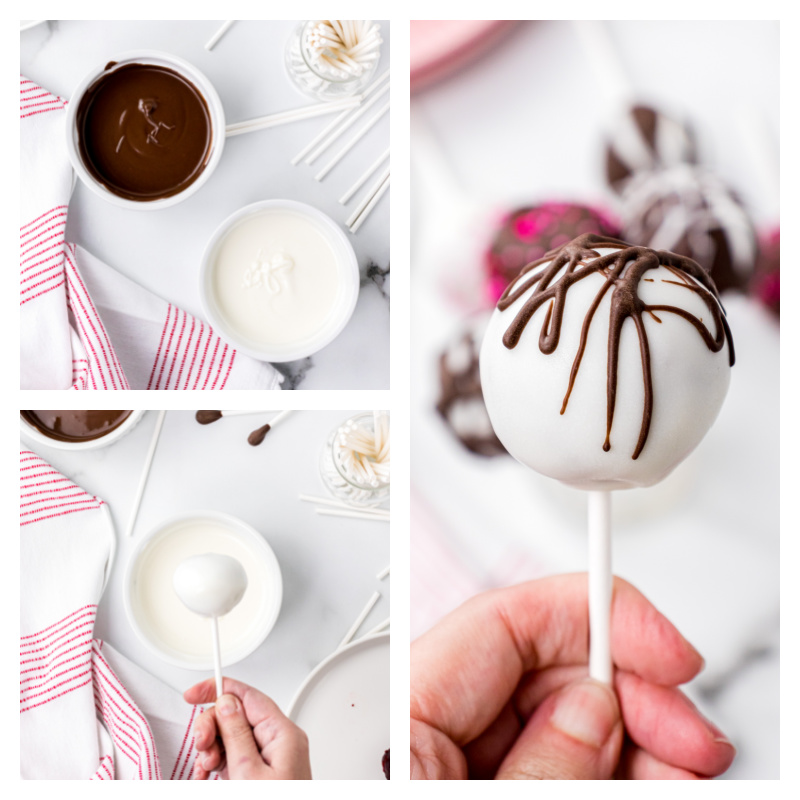
The next step is dipping the cake pops in chocolate. Melt the chocolate (or melting wafers). We used vanilla and chocolate wafers here, but you can use any color melting wafers you’d like (there are a lot of different kinds at craft stores).
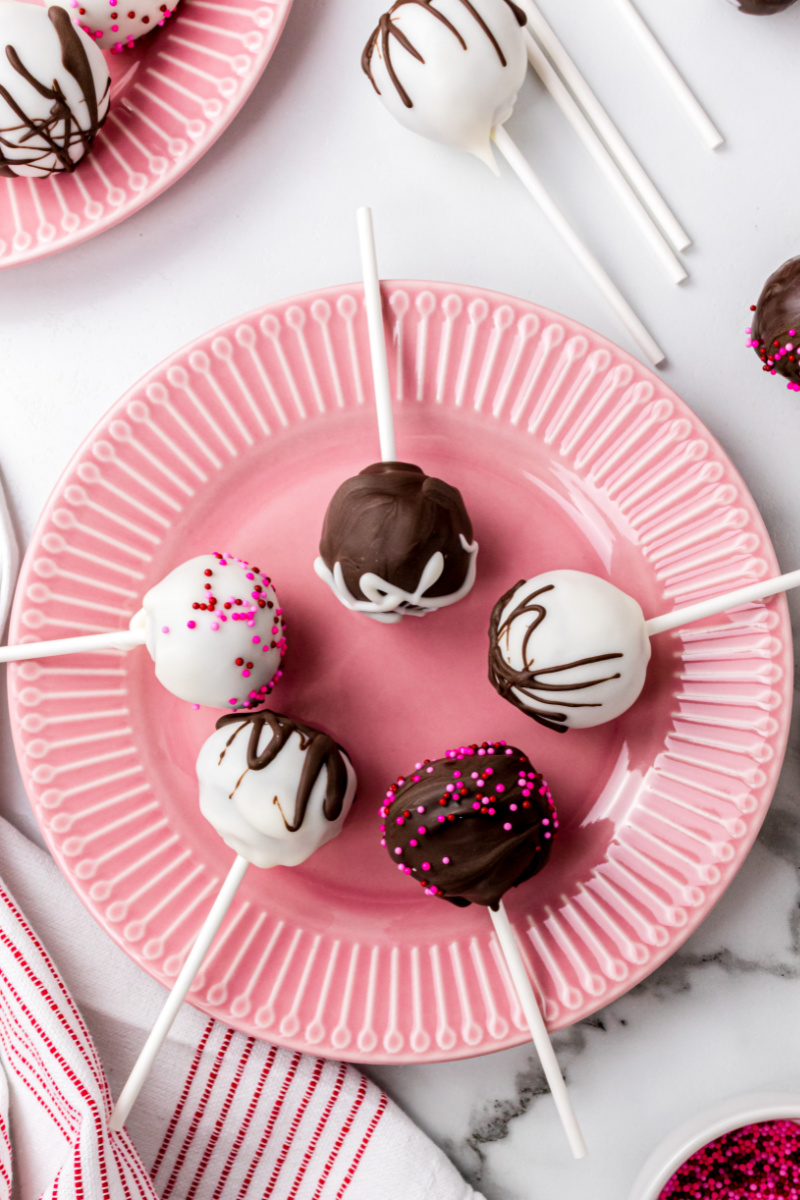
Dip the end of your stick (also available at craft stores) into the melted chocolate, and then poke the stick into one of the chilled cake balls. Then dip into the chocolate and shake a little to get the excess to drip off. Immediately add decoration to your pop. Drizzle another color on there, or add some sprinkles.

I remember Brooks telling me when he first made these what a time consuming project this is. It definitely takes more time than just baking a cake or cookies, but the result is so satisfying!
Place the dipped red velvet cake pops onto the waxed paper to dry. Alternately, you can poke them into a foam block (available at craft stores) so they’re drying upright.
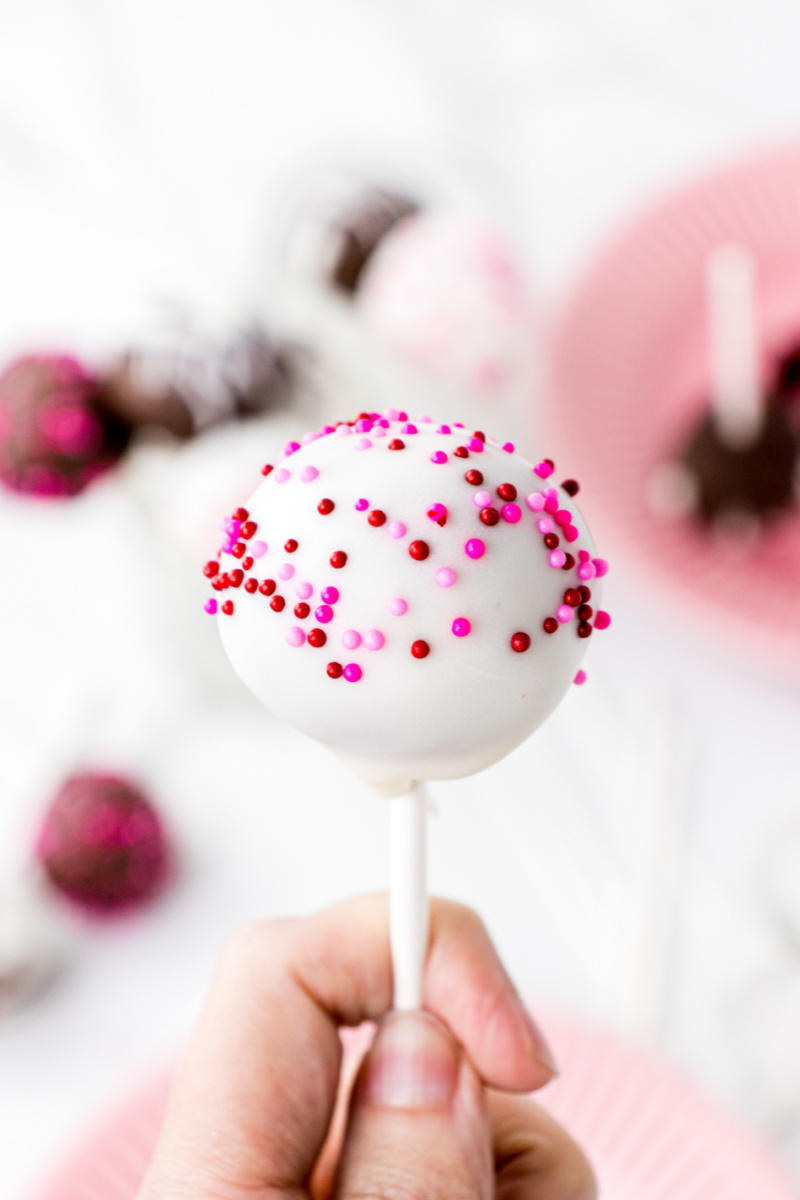
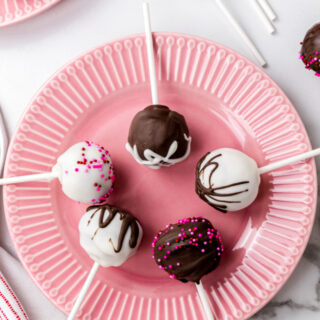
Aren’t they so pretty?

As mentioned before, you can make these into Red Velvet Cake Balls instead of pops, if you’d like.
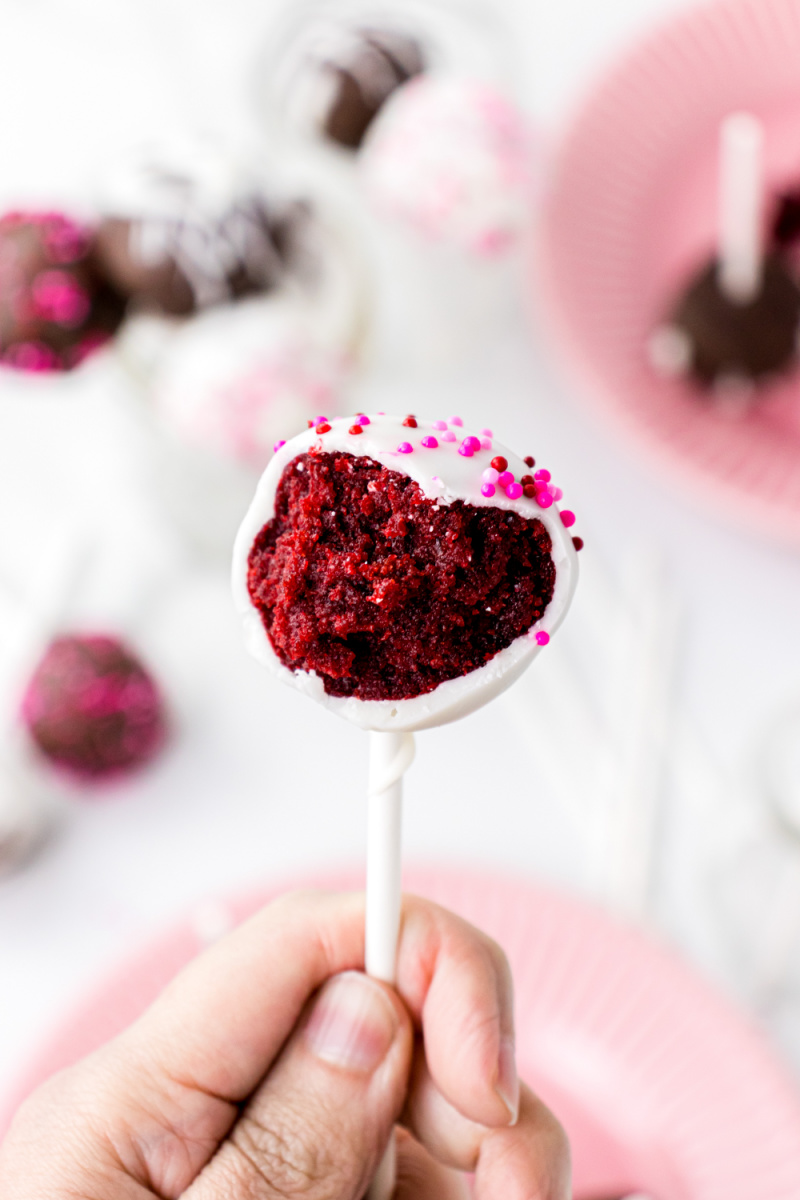
Once you bite into them, you get to taste that cream cheese cake mixture inside!

These are “RecipeBoy Approved” for sure! Make some red velvet cake pops for your next event or party, and your guests will be so impressed. Enjoy!
Here are a few more dessert recipes you might like to try:
- Texas Sheet Cake
- Chocolate Cherry Dump Cake
- White Chocolate Raspberry Bundt Cake
- Lemon Cupcakes with Lemon Buttercream Frosting
- Cookies and Cream Cake
Red Velvet Cake Pops
Ingredients
- 1 box red velvet cake mix (use package instructions to bake a 9x13-inch cake)
- One 16-ounce can cream cheese frosting
- One package chocolate bark (regular or white chocolate- or both)
- 40 cake pop sticks
- sprinkles, if desired
- wax paper and a foam block (optional), for cooling and setting
Instructions
MAKE THE CAKE BALLS:
- After cake is baked and cooled completely, crumble it into a large bowl.
- Add ½ can cream cheese frosting to the cake crumbles in the bowl. Use the back of a large spoon. (you can always add more frosting if you need it.)
- Roll the cake and frosting mixture into quarter size balls and lay on a wax paper-lined baking sheet. (Should make about 45. You can get even more if you use a mini ice cream scooper, but I like to hand roll them.)
- Chill the cake balls in the fridge for a couple of hours. (You can speed this up by putting in the freezer for about 15 minutes.)
- Melt the chocolate candy coating in the microwave per directions on package.
MAKE THE CAKE POPS:
- Dip a stick in chocolate, and then insert it part-way into a chilled cake ball. Then dip in the melted chocolate mixture and let the excess drip off. Set on waxed paper to dry. Or (for best results), poke the dipped cake pop into a foam block so it's standing upright to dry. (You can buy a foam block at a craft store). Add a pinch of sprinkles to the chocolate while still wet, if desired.
- The cake pops should be refrigerated until ready to serve, so plan for that.
Notes
- Total time does not include the baking of the cake.
Nutrition
This recipe comes from RecipeBoy.com


I am impressed that you made these little balls of joy. My attempt at making them was a massive failure. I better give them another try. Good job big guy!
Brooks! You are too cute.
Red velvet its my favorite … and if you like them best on the first day, try them on the third. I think they taste even better after they sit for a couple of days.
Great job on these.
Cake Pops look amazing. Keep up the good work. Mis you.
mmm. these look good! i think i’m going to making these tonight!
Hmm I sugest putting the cake pops with the sticks on them in a foam block so it’s completely covered with candy melts and has a smooth finish.